Payments
This section explains how to initiate and manage payments through our Client Portal. It covers the different types of payments you can make, including internal transfers, single beneficiary payments, and bulk payment uploads.
Initiate payments
You can initiate the following types of payments:
- Internal Transfers: Transfer funds between your own accounts.
- Outgoing Payments: Make payments to external beneficiaries by entering their details or selecting from saved recipients.
- Bulk Payments: Upload a bulk payment file to process multiple payments in one go, streamlining high-volume transactions.
Each payment type offers intuitive forms and step-by-step instructions to guide you through the process. Once submitted, you can monitor the status of your payments directly from the Payments section.
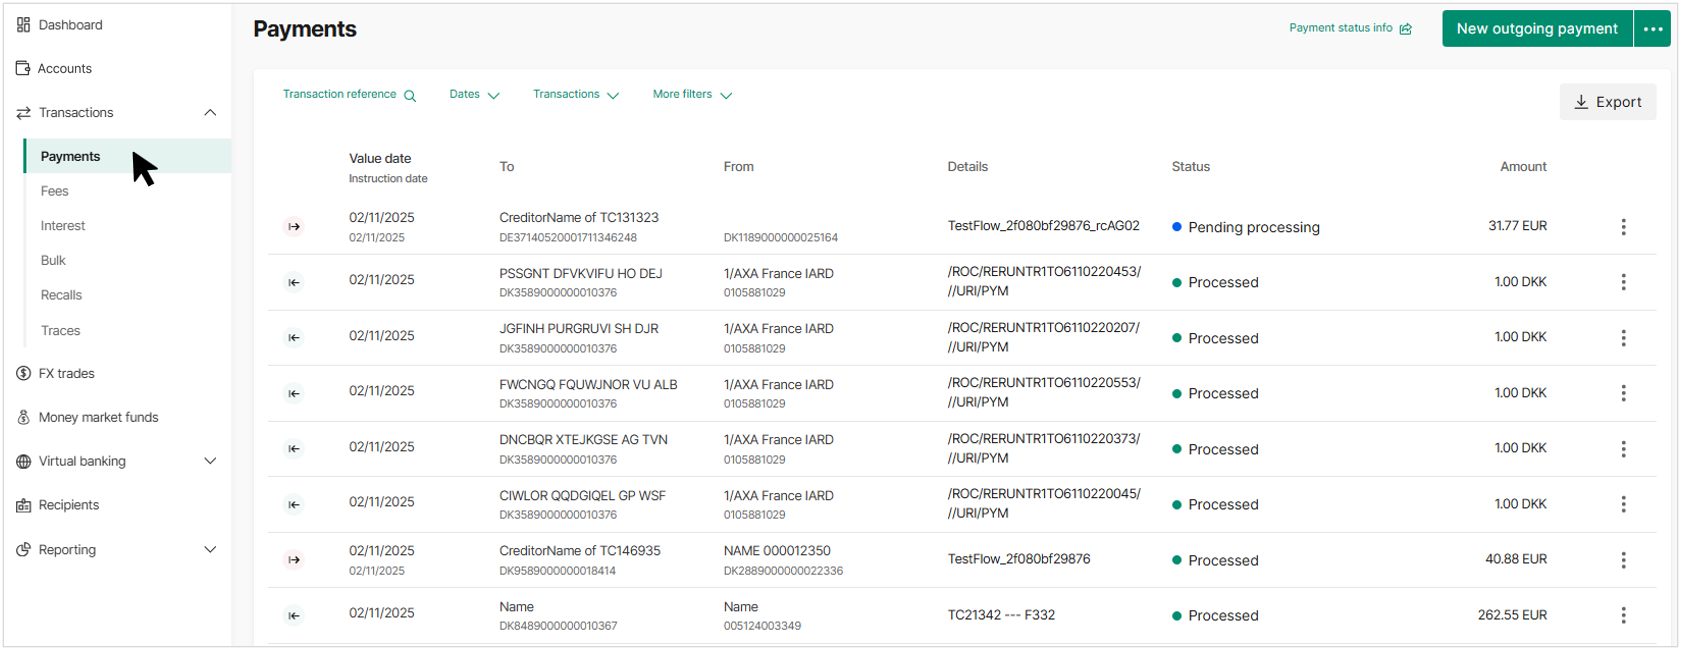
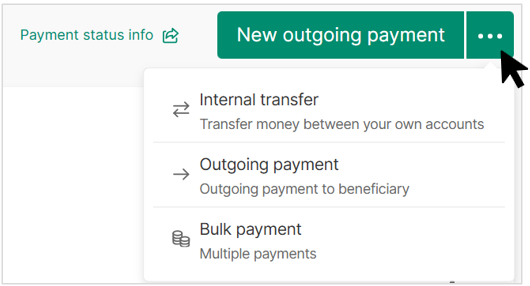
Initiate an internal transfer
- Open the internal transfers form by clicking the three dots in the top right corner
- Fill in the payment details
- Click "Initiate payment"
- Depending on your setup, the payment might need to be approved by a colleague of yours
Initiate an outgoing payment
-
Open the outgoing payment form by clicking "New outgoing payment"
-
Fill in the payment details
-
You can specify the charge bearer as either "SHA", "OUR" or "BEN", which may impact which party will cover the cost of executing the payment. Read more about the charge bearer functionality here.
-
The Clearing Network can also be specified but it is not mandatory. Note, If no selection is made, your default clearing network will be applied. If you choose a clearing network that is not approved in your client agreement, then default routing logic will apply. Read more about the routing logic here.
- If EUR is selected as the transfer currency (You send OR Recipient gets), the user can choose between SEPA SCT, SEPA Instant, and T2.
- The transaction amount for SEPA Instant is currently a max limit of 999,999 EUR. If the amount is above the max limit then SEPA Instant option is not available.

You send amount field in EUR

Recipient gets amount field in EUR
-
c. If other currency is selected then the Clearing network option is not available.
- Click "Initiate payment"
- You will be asked to SCA approve the payment using the Authy app
- Depending on your setup, the payment might need to be approved by a colleague of yours
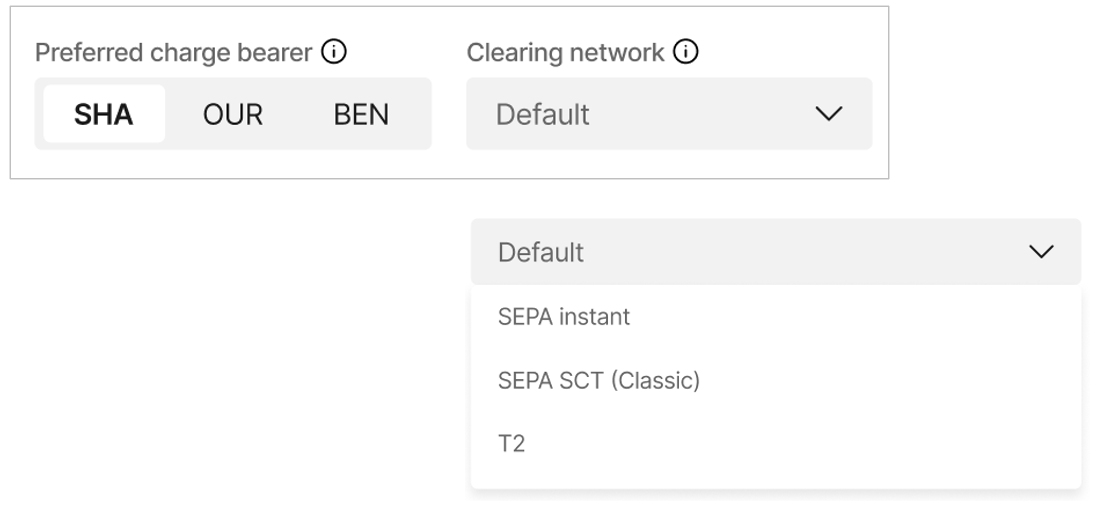
Charge bearer and Clearing network selection
Initiate payments in bulk
There are two separate tasks involved in completing bulk payments.
Task 1: Prepare Bulk file
Task 2: Upload Bulk file and initiate payment
Task 1: Prepare Bulk file
- Prepare a bulk file in either csv or txt format, adhering to our bulk file format Bulk payment csv format
- Note that you can leave optional fields empty, but not skip them. This means you should remember to insert the comma as when you separate populated fields.
- Each payment should be on its own line
Task 2: Upload Bulk file and initiate payment
- Log into the Client Portal
- In the top right corner, click the three dots in the top right corner and choose "Bulk payment"
- Upload the bulk file from your computer by using drag and drop, or click on the upload field to manually select a file from a folder on your computer. (It's currently only possible to upload one file at a time).
- Click "Initiate"
- As with single payments, SCA authentication and approval might be needed
- In the event of errors, you can make use of the Partial Bulk functionality to proceed with errors, or you can stop the initiating completely and none of the payments are submitted (see below).
- The uploaded file will be shown below the file upload field (It is possible to delete the file by clicking the delete icon next to the file name (the icon is visible when hovering over the file name))
The payment may need to be authenticated under Strong Customer Authentication (SCA) by using the Authy app.Depending on your setup, the payments may also have to be approved by an internal approver.
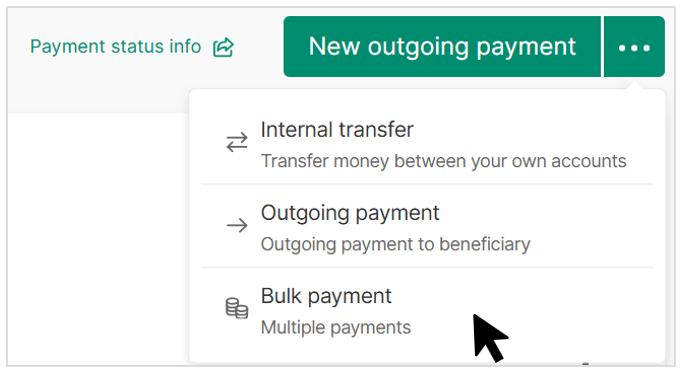
Bulk payment
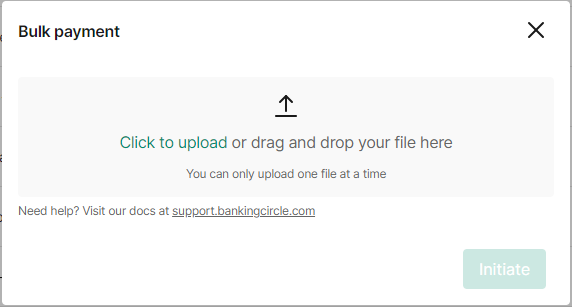
Upload your file
Errors in Bulk file
The system validates the bulk file upon upload, identifying both the count and nature of any errors. At this point, you have two options:
- Don't submit the file, correct the errors, and then re-upload
- Submit the file, allowing error-free payments to be initiated, with erroneous payments corrected later via the Dashboard, Payments list, and Rejection Report
If the entire bulk file is rejected, an error message will appear. Export the errors, correct them, and then re-upload the file.
Partial bulk
The Partial bulk feature ensures that all valid payment instructions within a bulk file will be initiated, and only the payments containing errors are rejected.
When uploading a bulk payment file, a message will be displayed stating that “Some payments cannot be uploaded” if there are errors within the file.
- Click Export errors to download a csv file containing the errors, in order to correct the invalid payment instructions later.
- If you wish to continue, click the Proceed anyway button. By clicking Proceed anyway, the valid payments will be initiated and sent for processing.
- All invalid payments can be found on the Dashboard, Transactions Overview, and the Rejection Report. You can then correct the invalid payments and reupload them as either bulk or single payments.
- If there is an instance in which the bulk file can’t be accepted at all, a message will display “The bulk file cannot be uploaded”.
- From here, it is possible to export the errors, correct the invalid payment instructions, and then upload the bulk file.
Currency conversion
For internal transfers between accounts in different currency, a conversion will be applied. You can either specify the transfer amount in the currency of the "from account" or the "to account".
For outgoing payments, you can choose to send the payment in another currency than the currency of the "from account":
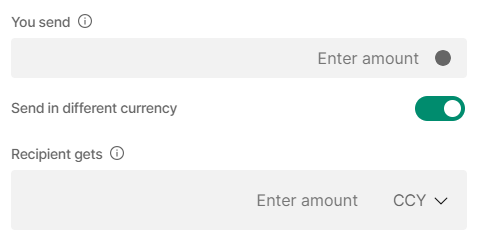
Enter an amount in the "You send" field to set the sender's debit amount. The received amount depends on the current exchange rate. To control the recipient's received amount, fill out the "Recipient gets" field. The sender's debited amount will then be subject to the exchange rate at the time of processing.
Approve and decline
Go to the "Pending approvals" section in the Dashboard. All single and bulk payments pending approval will be displayed here, and you can approve and decline from here.
Alternatively, you can go to the Payments overview and also approve payments from here. You can filter on the status "Pending approval".
For bulk payments, you can resolve the payments individually or the entire bulk file in one go.
Which payments can I approve?You can only approve payments if you have the "Approve payments" permission. You cannot approve payments that you've initiated.
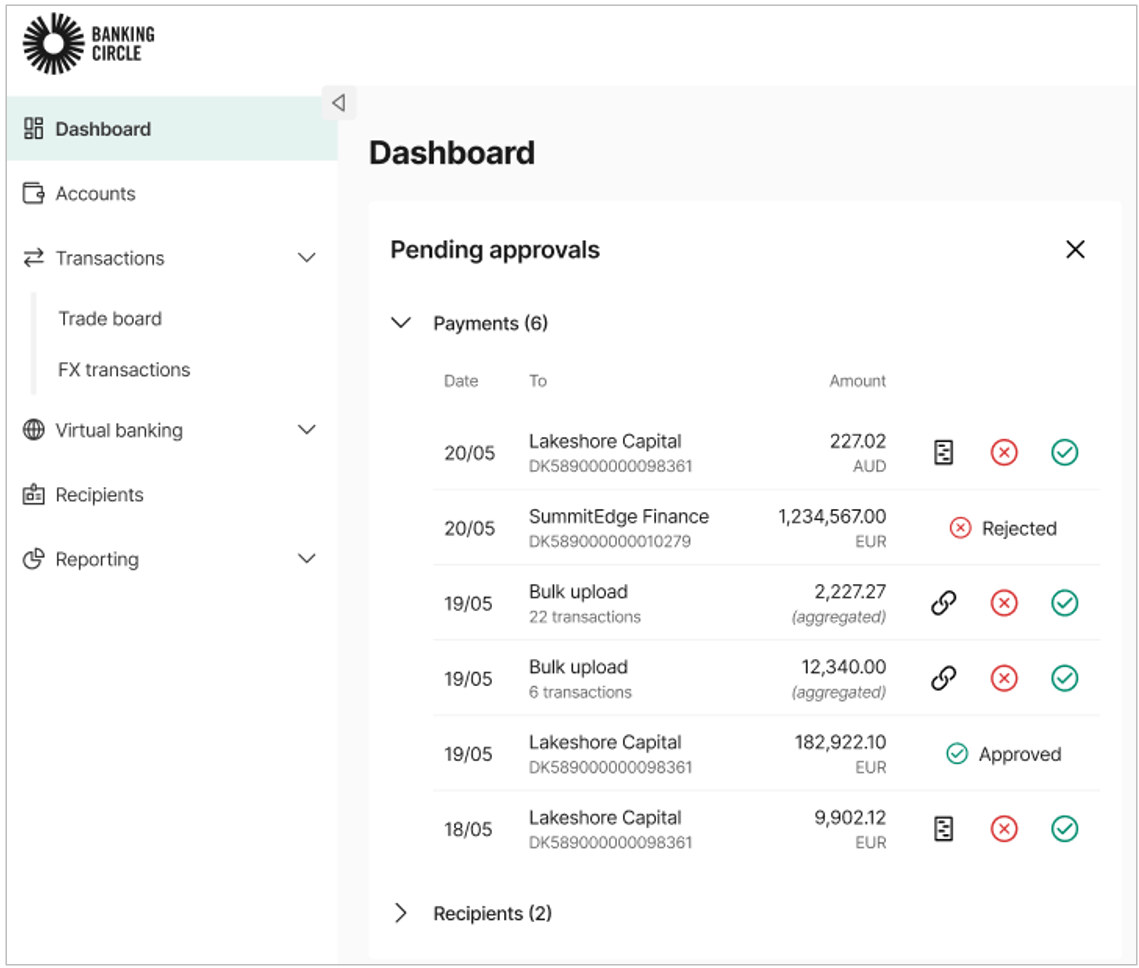
Dashboard - Approve or Decline single or bulk payments
Payment cancellation
Cancellations no longer require approval for single or bulks payments, regardless of your approval setup. Once a cancellation is requested, it will proceed directly without triggering the approval workflow.
- No approvals are required.
- No Authy app (SCA authentication) prompts will be generated.
- The payment will transition directly to Cancelled or the next appropriate status depending on payment state.
Updated Cancellation Rules
The cancellation logic has been simplified and now clearly distinguishes between payment initiators and non-initiators:
- Only the payment initiator can trigger cancellations for payments in the approval stage (e.g., Pending Approval, SCA Pending).
- Non-initiators can only cancel payments that have not yet reached processing or settlement (e.g., Missing Funding, Pending Processing), and even then, only when supported by the core banking system.
The following table represents the new logic:
| Status of payment | Can payment initiator cancel? | Can non-initiator cancel? |
|---|---|---|
| Pending Approval / Declined By Approver | ✅ Yes | ❌ No |
| SCA Pending / Expired / Declined / Failed | ✅ Yes | ❌ No |
| Missing Funding | ❌ No | ⚠️ Yes, but no guarantees of cancellation |
| Pending Processing | ❌ No | ⚠️ Yes, but no guarantees of cancellation (not possible if ValueDate = Today) |
To cancel a payment:
- Navigate to Transactions -> Payments.
- Identify the payment you wish to cancel and click on it to view the details.
- In the lower right corner of the details view, click Cancel.

Payment rejection
Payments may be rejected due to:
- Insufficient funds
- Duplicate
- Invalid BIC format
Check the Unprocessed payments report to understand the rejection reason and take appropriate action. To generate or schedule this report, go to Reports and select Unprocessed payments
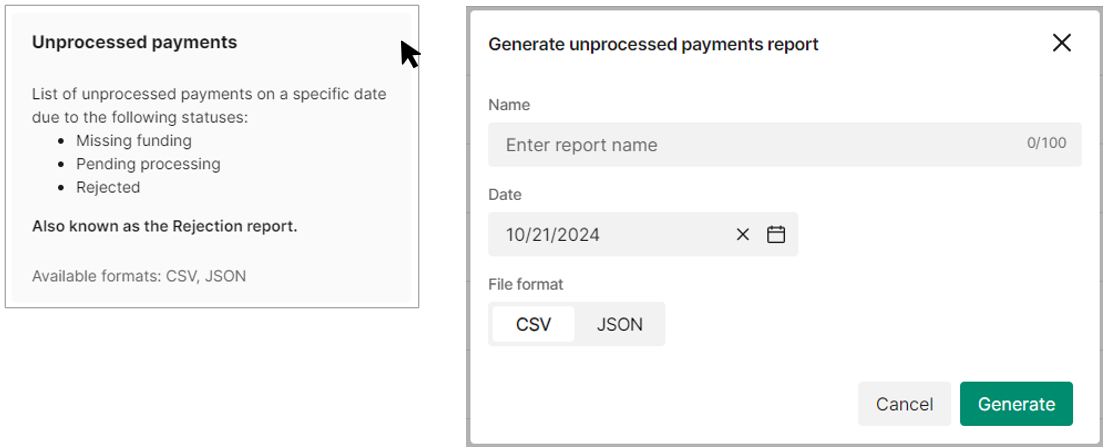
Create an Unprocessed payment report
Payments outside of operations
Ensure territories involved in your payments are approved beforehand. If a territory isn't part of your flow, contact your Relationship Manager for approval. This prevents payments from being held up.
Updated about 21 hours ago
